Welcome to the tutorial in the “Creating a Set of Digital Painting Icons” series. In this installment we will create a paint brush icon, complete with wooden palette and paint dollops. We will employ textures, layer styles and a good sense of lighting to create a fun looking icon.
Psd Plus Membership
Want access to the full PSD files and downloadable copies of every tutorial, including this one? Join Psd Plus for just $9/month. You can view the final image preview below.
Tutorial and Series Details
Below are the five icons we are creating in this series. In this tutorial we’ll be making the paint brush icon.
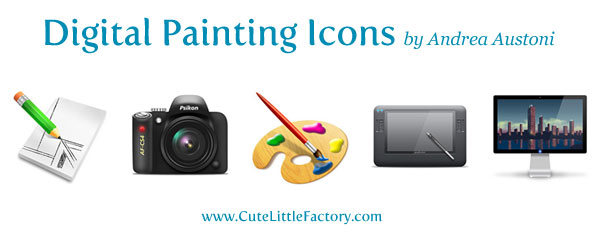
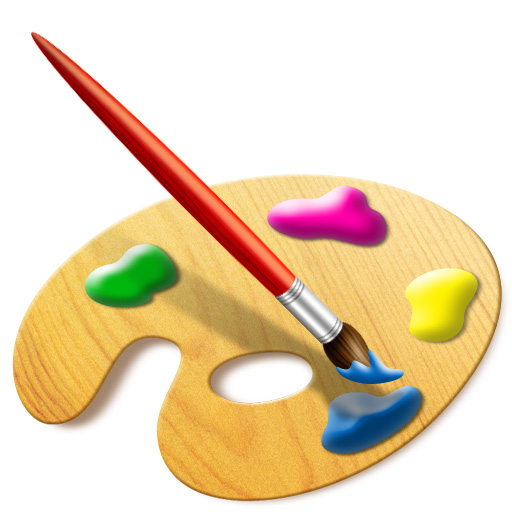
Take at the look at the finished icon in this tutorial, which combines a touch of realism and a touch of fun. They both never hurt!
- Program: Adobe Photoshop CS2 and Later
- Difficulty: Intermediate
- Estimated Completion Time: 1.5 hours
Step 1
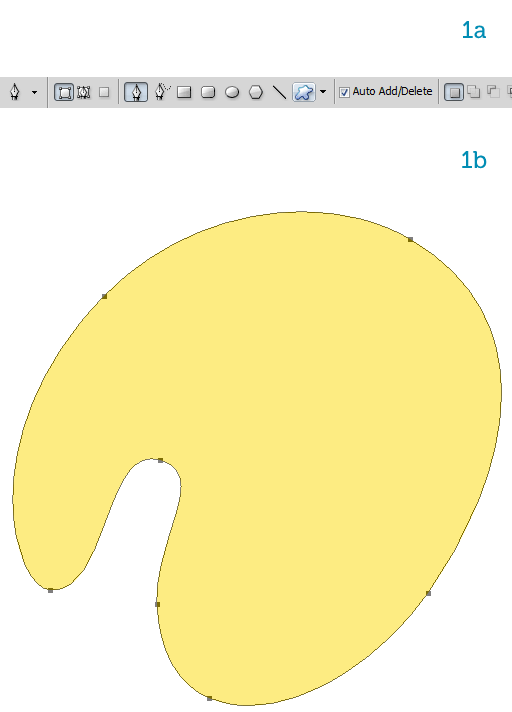
We will need two wood textures for this icon so let’s download them from StockXchng: first texture and second texture.. Start Photoshop and create a new blank document that is 512 pixels by 512 pixels. Set the foreground color to a pale yellow then type P to select the Pen Tool. Make sure the Shape layers mode is active (1a) and draw the outline of the palette (1b). Name the layer “palette.”
Step 2
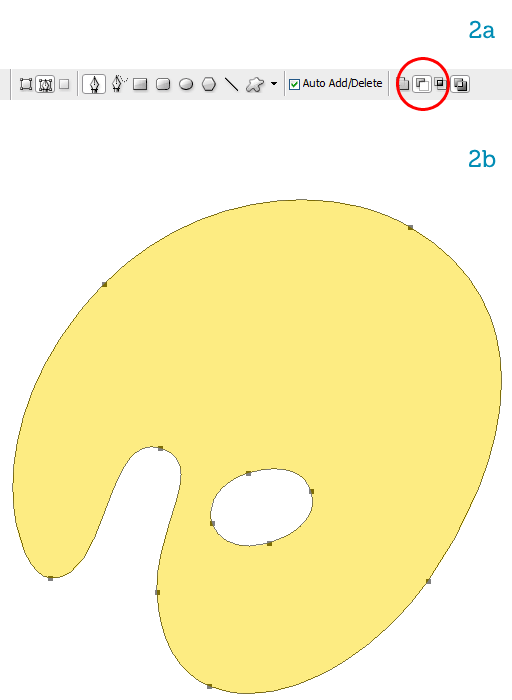
In the Pen Tool options choose Subtract from path area (2a) and draw an ellipse. It will be subtracted from the main shape, thus creating a hole (2b).
Step 3
The palette’s shape is complete. Duplicate the layer then hide it. We will keep working on the copy. We are satisfied with the shape so we can right-click on it and choose Rasterize.
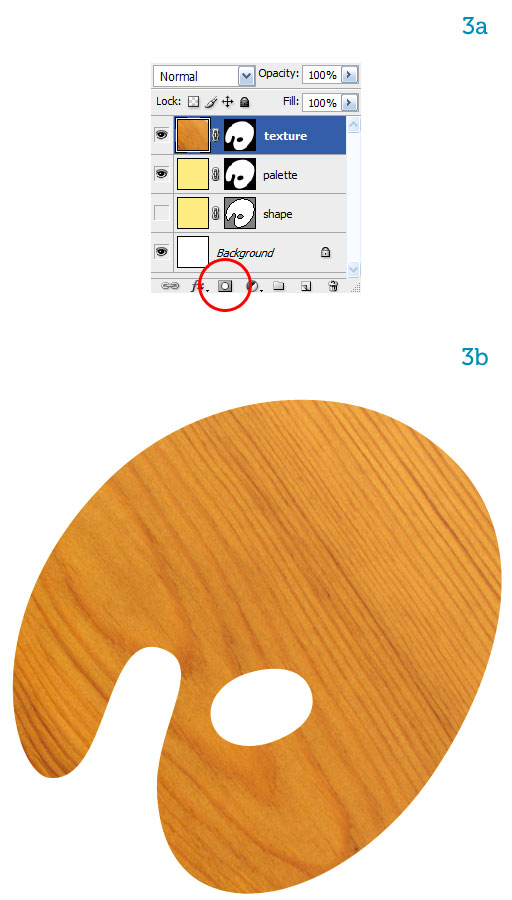
Import the first texture into the document, place it above the palette. Scale it and rotate it so it’s slightly bigger than the palette and its grain runs at an angle. Command-click the palette to load its contour as a selection, then mask the texture by clicking on the mask button at the bottom of the Layers palette (3a). The palette is starting to look good (3b).
Step 4
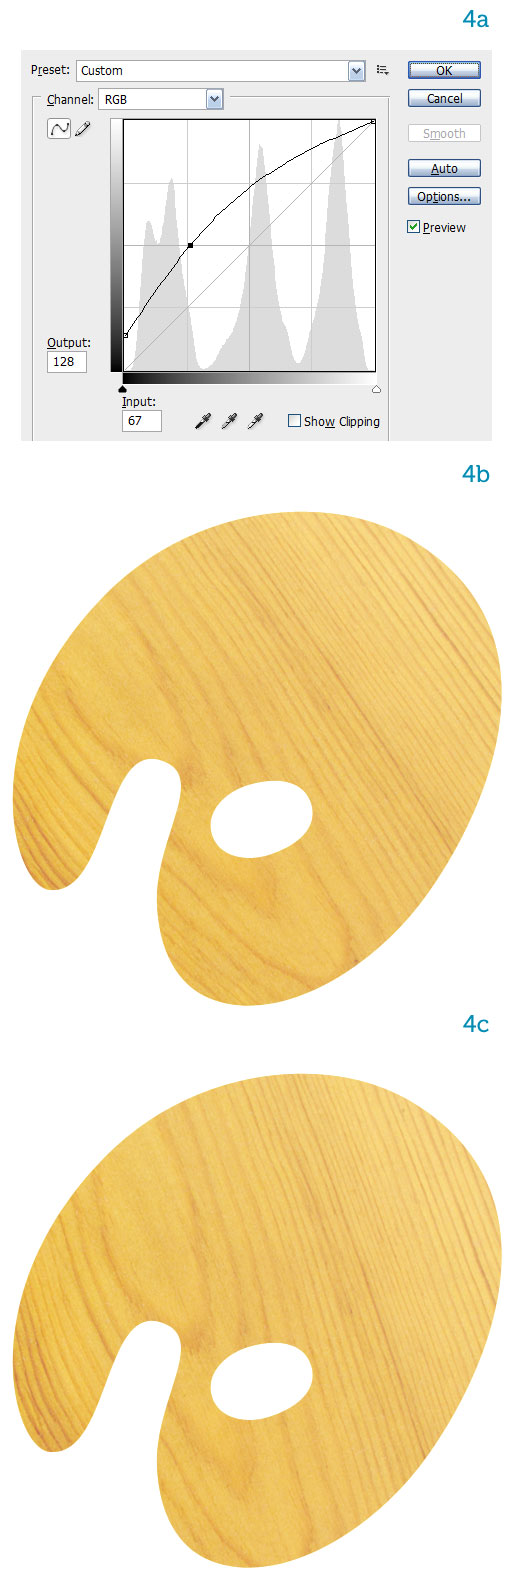
We want the texture to be much lighter than it is so hit Command + M to bring up the Curves window. Click the curve directly in the middle and drag up (4a) to lighten the texture (4b). At this point you might want to adjust the rotation like I did here (4c).
Step 5
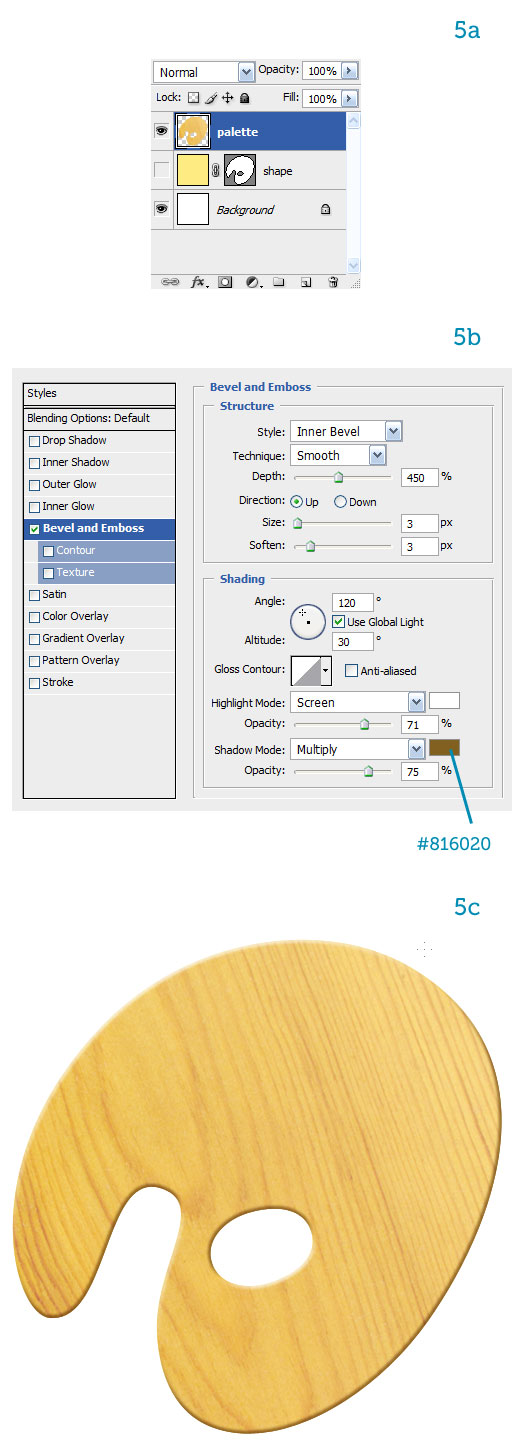
We can now merge the two layers, “palette” and “texture,” together. Select the “texture” layer, right-click on the mask and choose Apply Mask. Then hit Command + E to merge the layer down. A dialog will appear asking what you want to do with the palette’s mask. Choose Apply. Now we have a single layer (5a).
Let’s give the palette some thickness by adding a Bevel and Emboss layer style. Make sure you pick a dark brown color for the shadow instead of the default black (5b). The palette now looks much better (5c) but it’s not finished yet.
Step 6
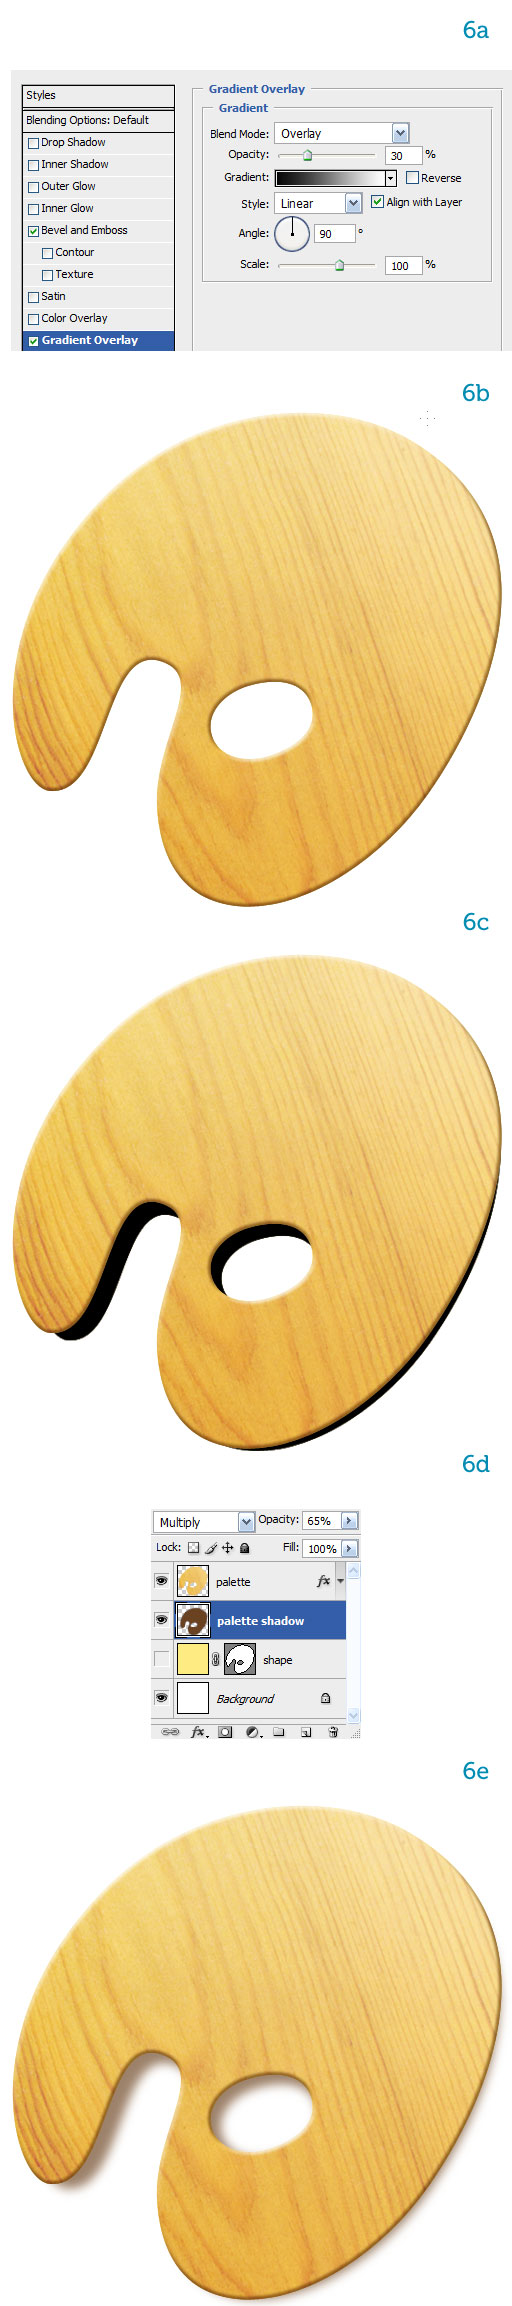
Add a Gradient Overlay style (6a) so the top is lighter (6b). Now duplicate the layer, naming the copy “palette shadow.” Clear all styles. Move the shadow below the palette and make it a bit smaller (6c). Fill it with dark brown, set it to Multiply mode and reduce the Opacity to 65% (6d). Go to Filter > Blur > Gaussian Blur and experiment with the values until the shadow looks similar to image 6e.
Step 7
Let’s add the paint dollops now. Using the Pen Tool in Shape layer mode draw a few colored blobs around the palette (7a). Select the blue one and add a Bevel and Emboss style (7b). The paint now looks thick and shiny (7c).
Let’s add some ambient reflections by adding an Inner Glow style too (7d). Now it looks more realistic (7e). Right-click on the blue paint layer in the Layers palette and choose Copy Layer Style. Now right-click on the other paint layers and choose Paste Layer Style. Change the settings to achieve some variation (7f).

Step 8
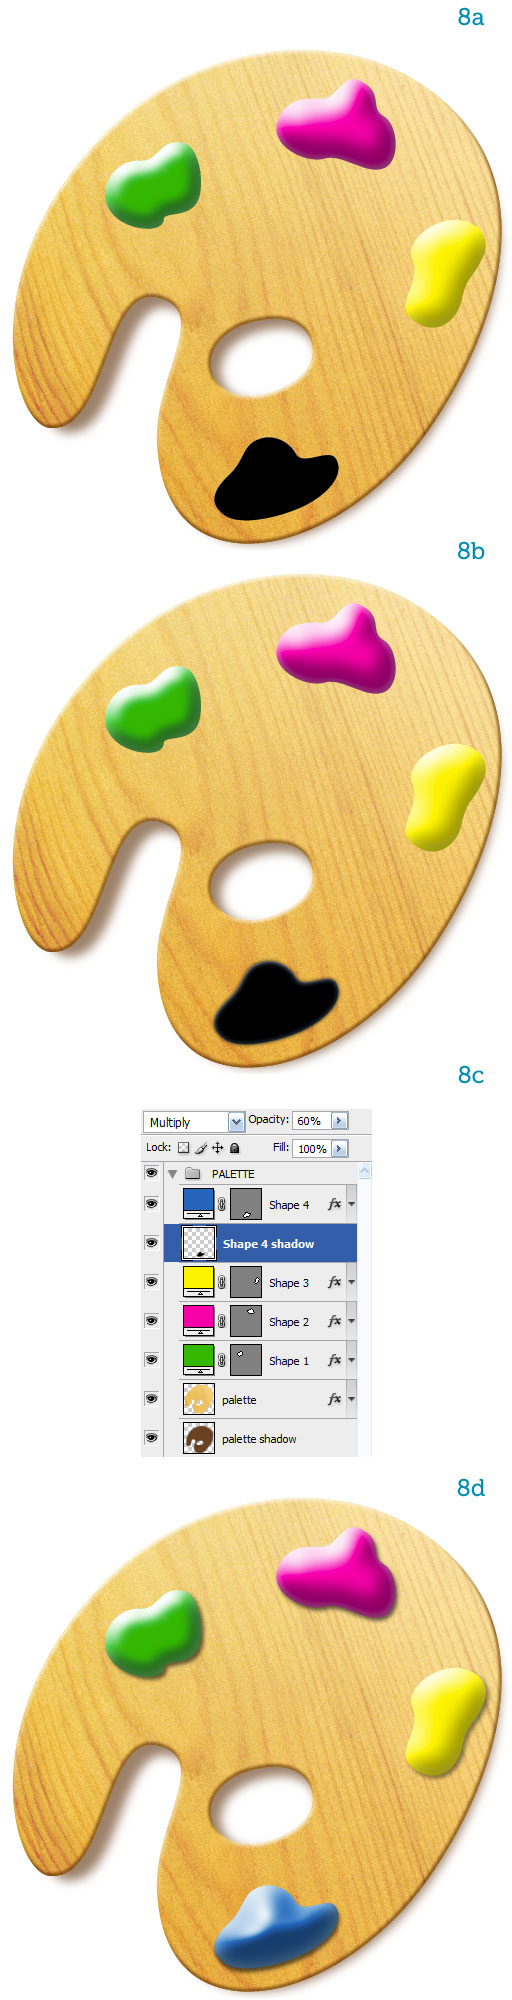
The paint dollops need a shadow. Let’s create one for the blue dollop then apply the same workflow to the others. Make a copy of the paint layer and rasterize it. Fill it with black (8a). Apply a 2px Gaussian Blur filter (8b). Set the layer to Multiply at 60% Opacity (8c) and move it behind and below the paint dollop. Image 8d shows the result for all paint colors. Note how the shadows are short, blurry and variously transparent. At this resolution some variation is always advisable.
Step 9
Let’s go back to the palette now because I am not satisfied with it. It’s too polished! Go to Filter > Noise > Add Noise and use the settings shown in image 9a to add a fine grain to the texture. Now it’s finished (9b). Group all layers together as “PALETTE” and hide them.

Step 10
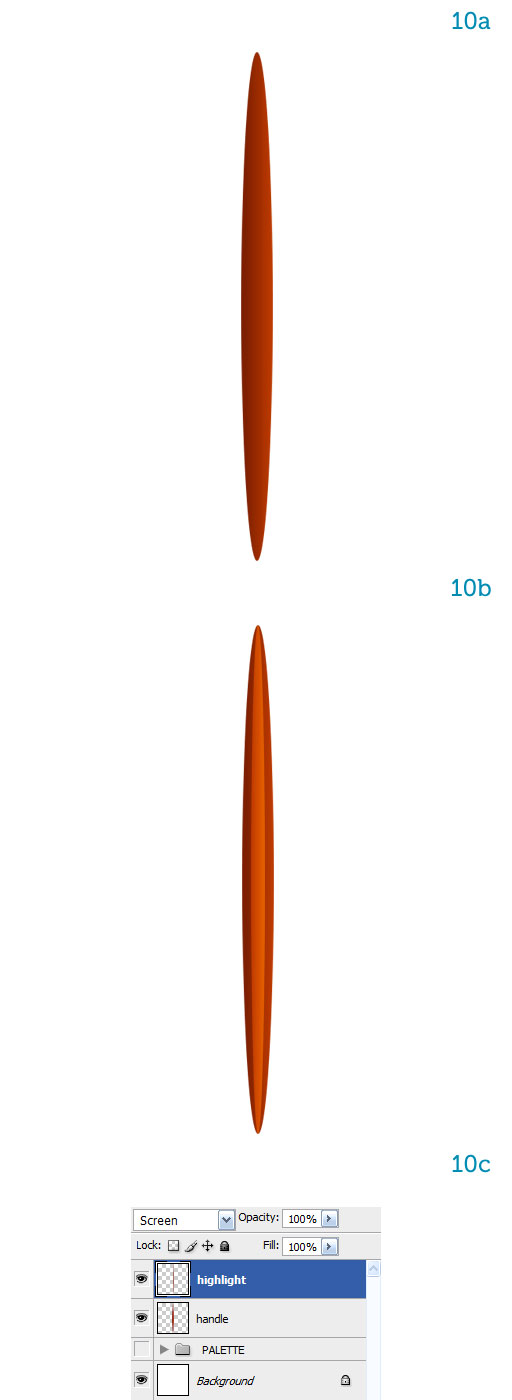
Let’s create the brush now. Draw a long, thin ellipse down the middle of the canvas. Use either the Pen Tool (and rasterize the shape once you’re satisfied with it) or the Elliptical Marquee Tool (M). Fill the ellipse with a subtle reddish-brown gradient. Make the left side darker (10a). This is of course the handle of the brush. Since it’s rounded we need to add a highlight across its length. Make a copy of the layer and scale it down horizontally (10b). Set it to Screen blending mode (10c).
Step 11
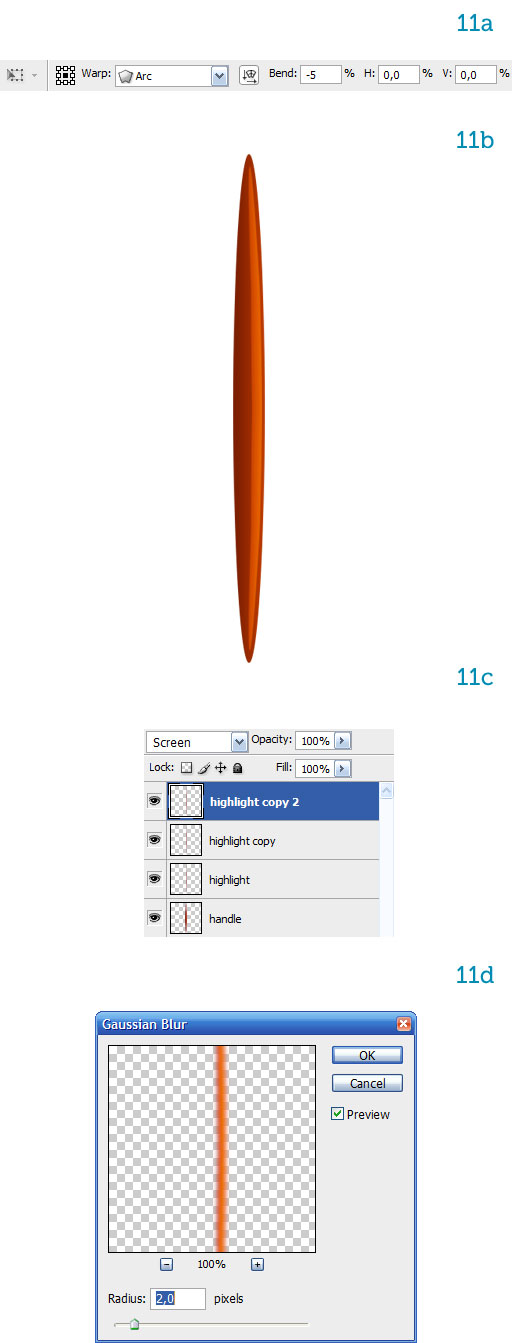
The handle is tapered at each end so we need to make the highlight conform to that shape. Hit Command + T to select Free Transform, then right-click on the highlight directly on the canvas, and choose Warp. In the Option bar at the top of the window choose these settings: Arc, toggle on the axis chooser and set Bend to -5 (11a). The highlight now bends to the right (11b). Duplicate the layer a few times then merge all copies together. This will make the highlight stronger (11c). Apply a 2px Gaussian Blur (11d).
Step 12
It’s time to add a wood texture to the brush. Drag the second downloaded texture into the document and scale it to fit the handle (12a). Mask the texture to the handle (12b). Apply the mask and merge the texture down. The result is nice but too dark (12c). With Command + L bring up Levels and drag the right slider to the left until the wood is light enough (12d). Adjust the highlight by making it brighter and less opaque (12e and 12f).

Step 13
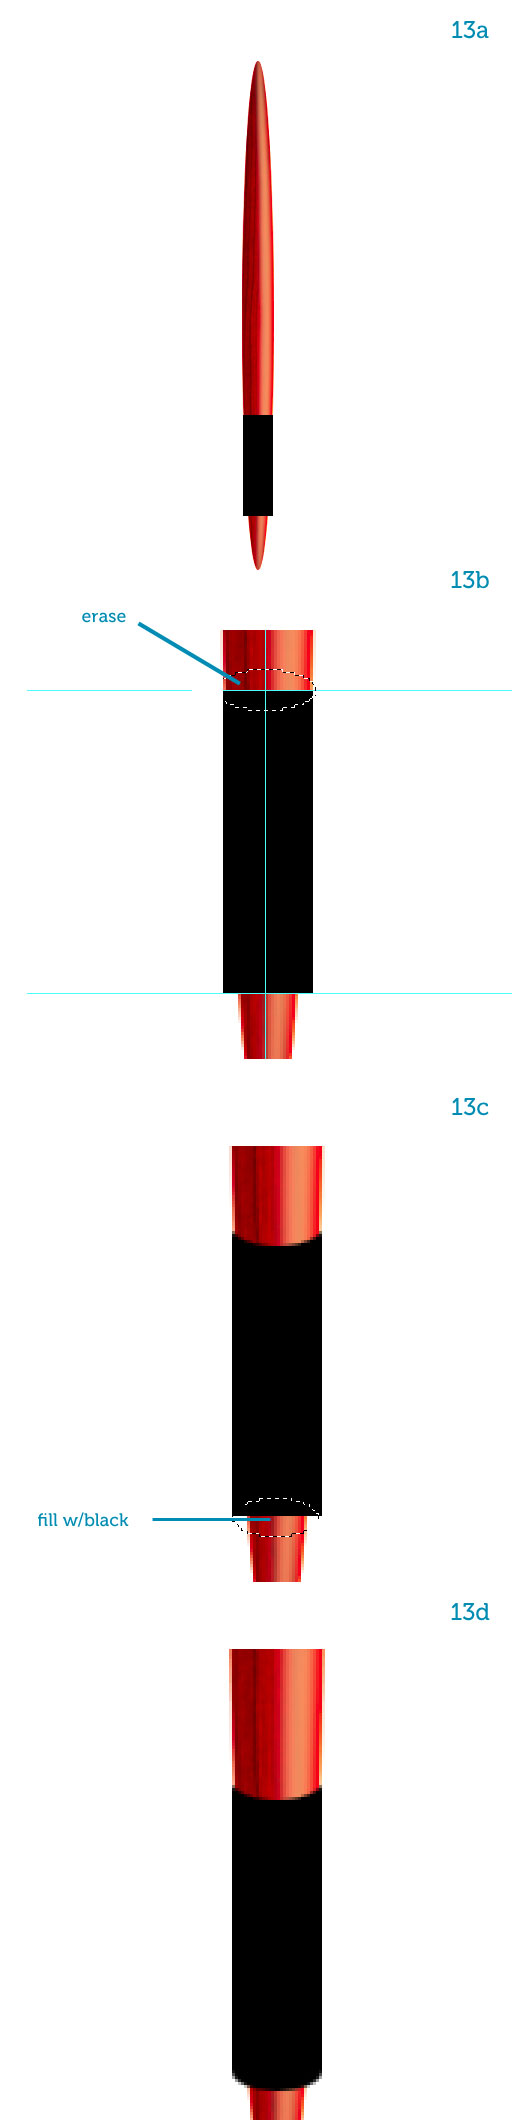
Now we need to add the metal grip where the bristles are attached. Draw a black rectangle about 3/4ths down the handle (13a). With the Elliptical Marquee Tool select the top edge and delete a half ellipse (13b). Now make another selection at the bottom edge and fill it with black (13c). The result is shown in image 13d.
Step 14
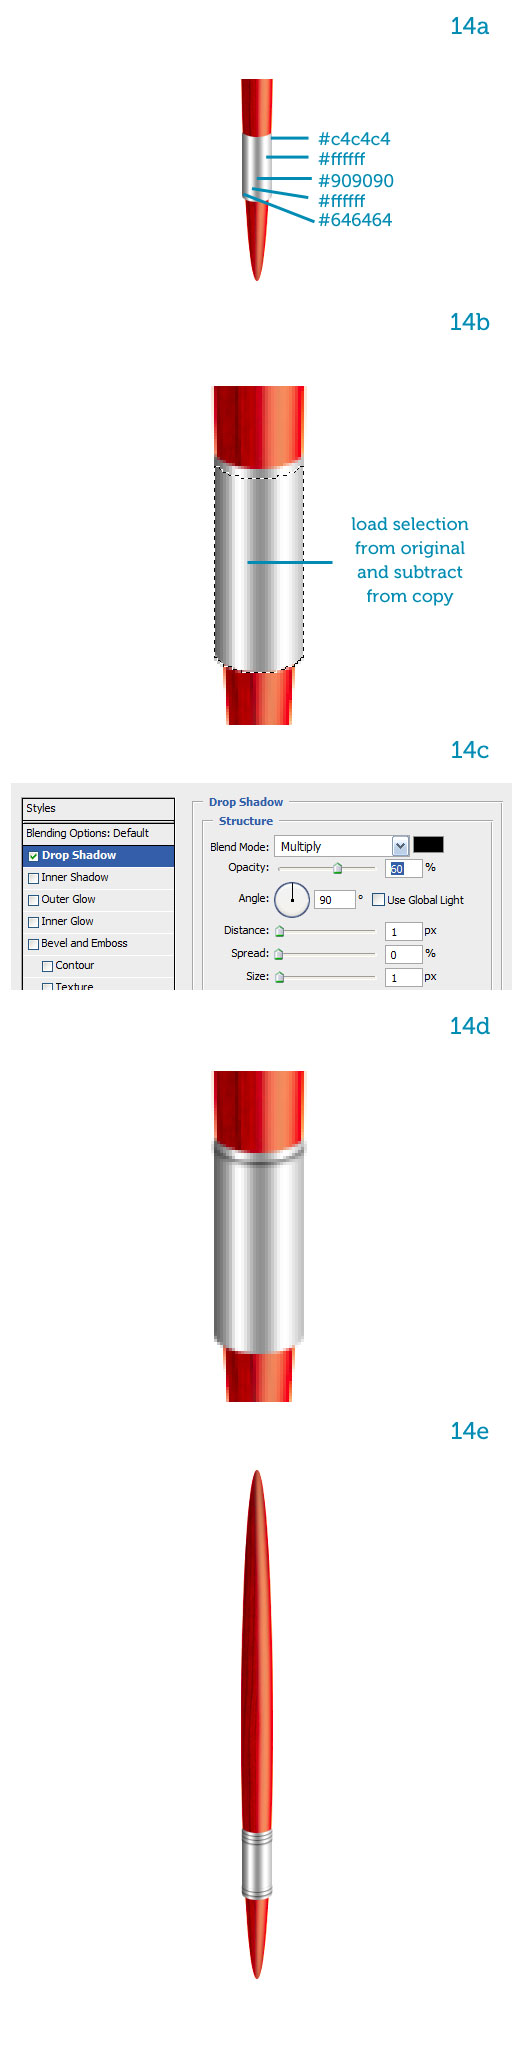
Adjust the length of the metal grip if you need to. Use a horizontal Gradient Overlay to simulate reflections on metal, use the colors shown in image 14a. Now make a copy of the grip, move it behind the original and nudge it up a few pixels. Command-click the grip and erase the selection from the copy (14b). Now add a Drop Shadow pointing downwards (14c). The result is a small indented ring (14d). Make a few copies and distribute them across the metal grip. When you’re done merge all layers together (14e).
Step 15
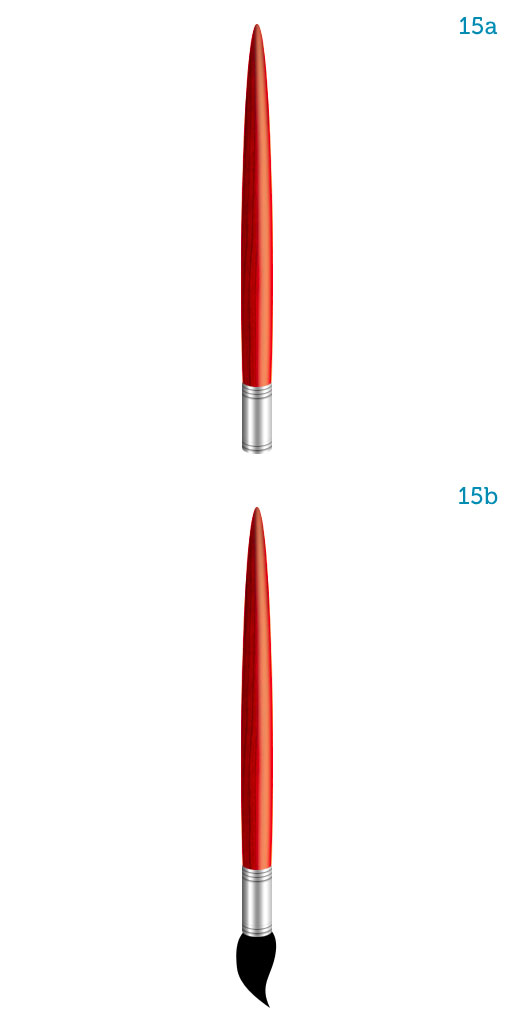
Let’s create the bristles now. Erase the bottom part of the handle, or just mask it out (15a). Draw the outline of the bristles with the Pen Tool in Shape layer mode (15b). Rasterize the shape when you’re satisfied with it and name it “bristles.”
Step 16
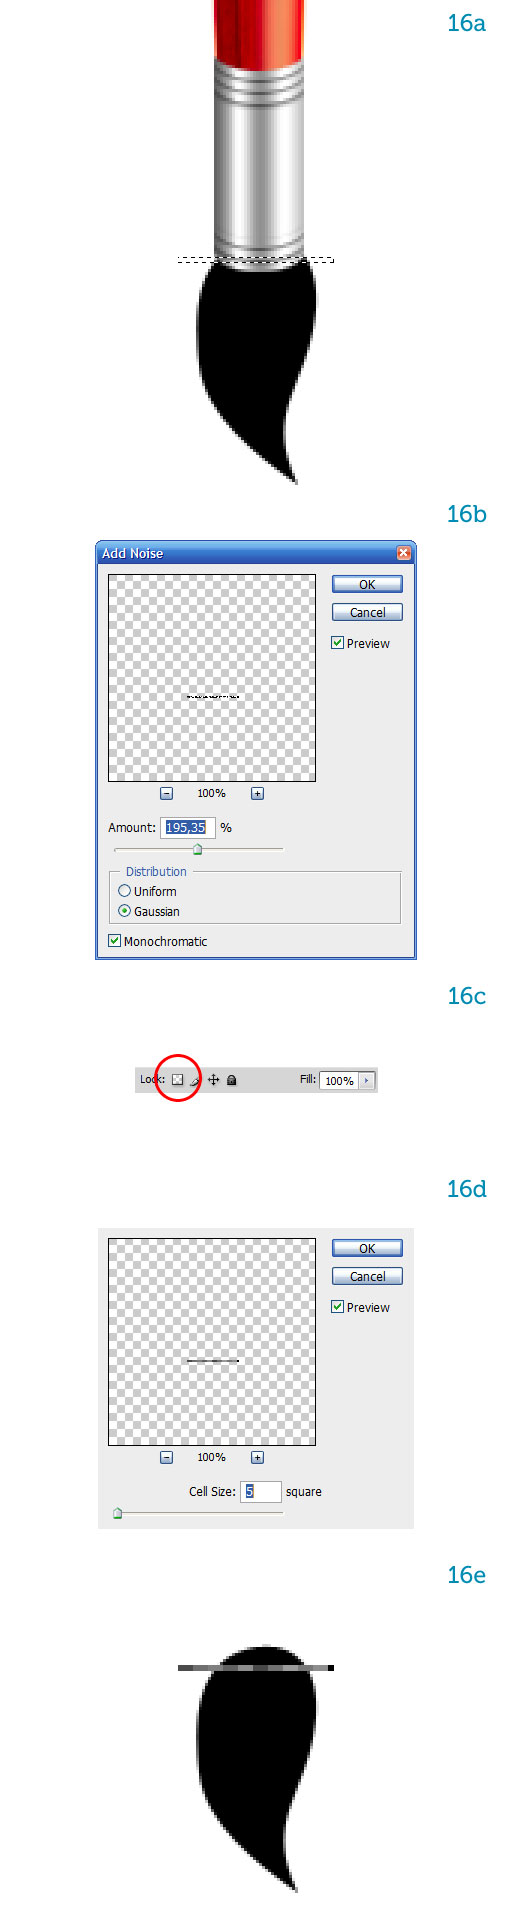
On a new layer select a thin horizontal stripe (16a), hit D to load the default black and white colors then Alt + Backspace to fill the selection with black. Go to Filter > Noise > Add Noise and choose the settings shown in image 16b. Activate Preserve Transparency for the layer (16c) and go to Filter > Pixelate > Mosaic and choose a Cell size of 5 (16d). Now the strip is filled with random grayscale pixels (16e).
Step 17
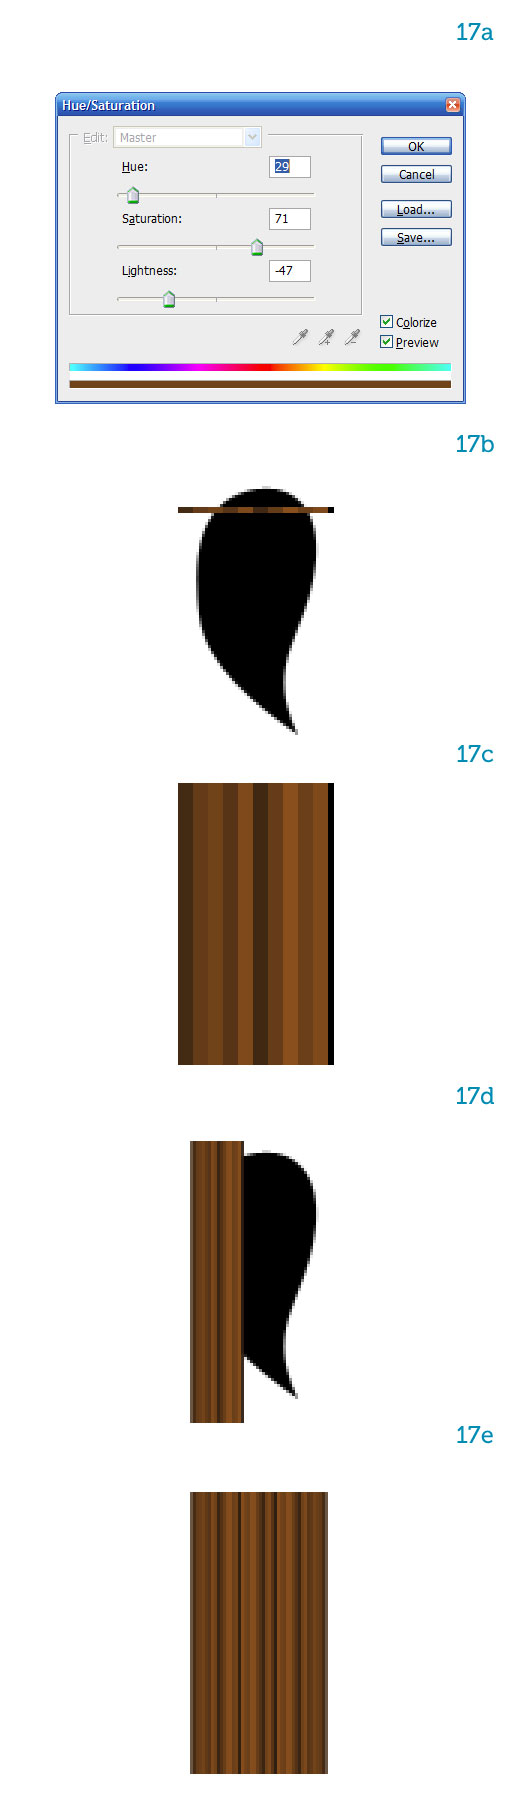
Type Command + U to bring up the Hue/Saturation window. Activate Colorize and move the sliders (17a) until the strip turns brown (17b). Stretch the layer vertically (17c) and squash it horizontally (17d). Copy it horizontally a couple of times until it covers the bristles (17e).
Step 18
Reduce the Opacity temporarily so you can see the outline of the bristles. Activate Free Transform (Command + T) and select Warp from the right-click menu (18a). Manipulate the points until the vertical lines match the shape of the bristles below (18b). When you’re done bring the Opacity back to 100%. Alt-click between the two layers to mask the lines with the bristle outline and merge the two layers together (18c). Group the bristles, handle and metal grip together as “BRUSH” (18d).

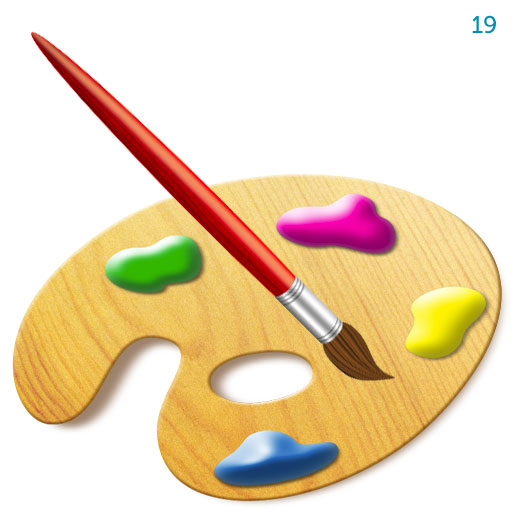
Step 19
Now let’s compose the palette and brush into the final view. Squash the palette vertically and move it to the bottom of the canvas. Rotate the brush 45 degrees counterclockwise (19). Let’s examine the shot. The light comes from the top of the palette, the paint dollops and the brush’s handle and metal grip are lit accordingly. The bristles are not though. Let’s correct that immediately.
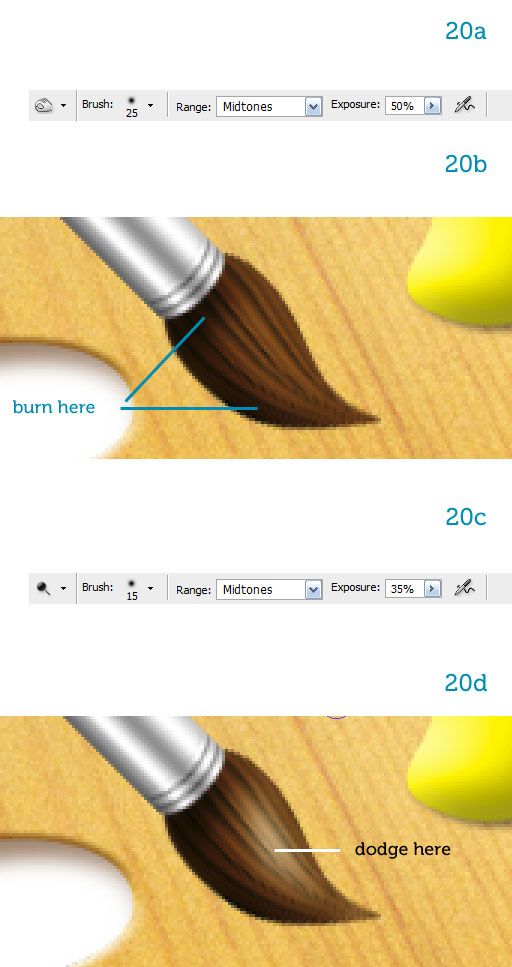
Step 20
Select the Burn Tool (O) and set it up as in image 20a. Paint the base and the bottom of the bristles to darken them (20b). Now select the Dodge Tool (O), set it up as in image 20c and paint a highlight across the middle of the bristles, where the light falls (20d).
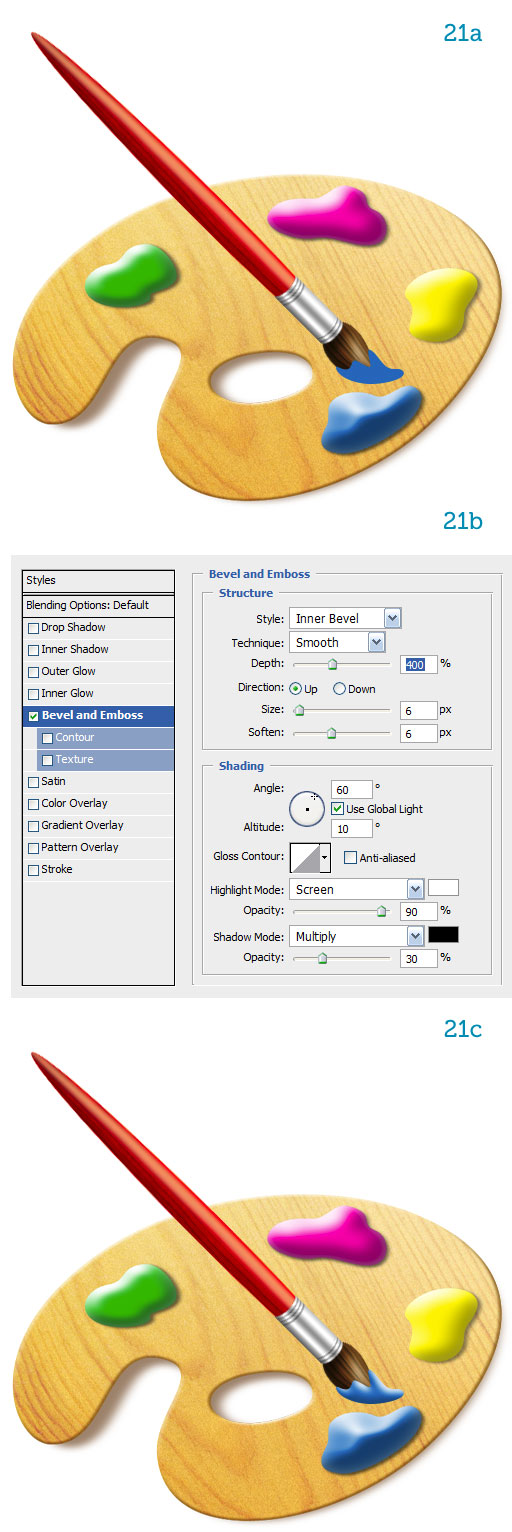
Step 21
On a new layer draw some blue paint on the brush with the Pen Tool (P) and position the blue paint dollop directly below the bristles of the brush. Now it looks like we just dipped the brush in the blue paint (21a). Apply Bevel and Emboss to the paint on the brush (21b) to match the lighting (21c). The brush is finished so we can merge all its layers together.
Step 22
The last thing to add is the brush’s shadow on the palette. Duplicate the brush and make the copy black (22a). Move it below the brush and modify its shape so it lies flat across the palette. To do that enter Free Transform (Command + T) and use a combination of Skew and Distort, both accessible from the right-click menu (22b). Mask the shadow to the palette (22c). Shadows are generally set to the Multiply blending mode and their Opacity varies from 40% to 70%. Pick 40% this time to keep the shadow subtle (22d).

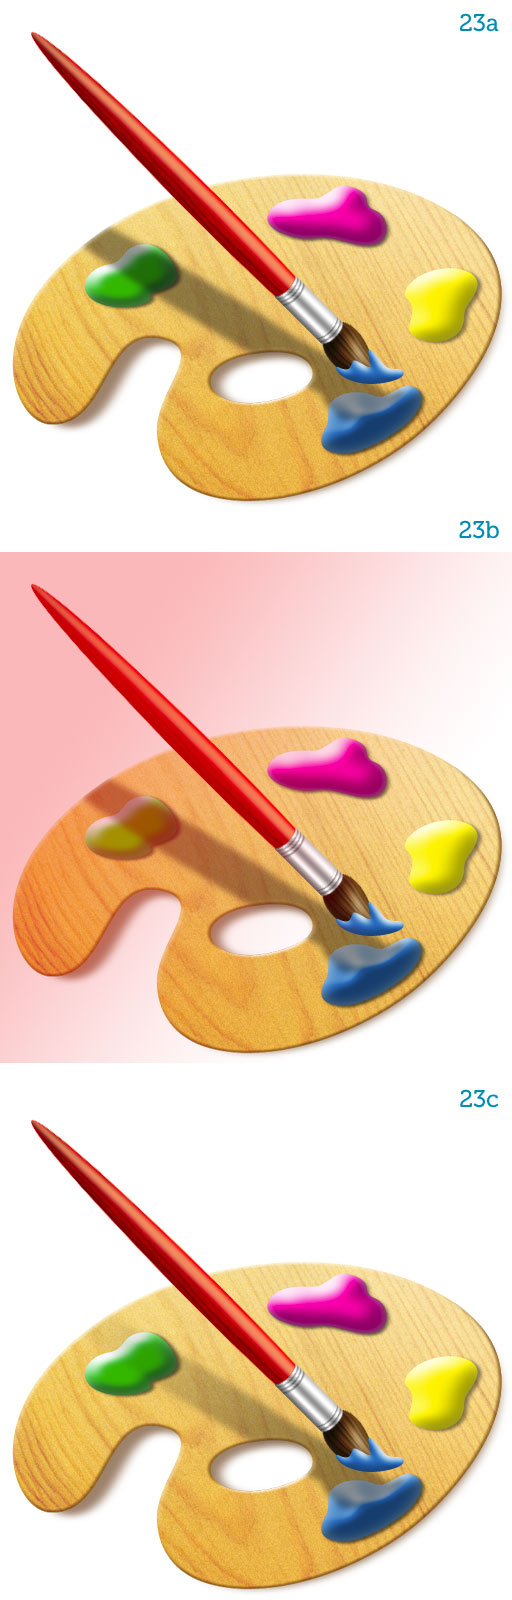
Step 23
Now let’s apply a 3px Gaussian Blur to the shadow (23a). Type Q to enter Quick Mask mode. Paint a black-to-white gradient from the top-left to the bottom-right corner. You will see a red gradient fading out: that represents the part that will be masked out (23b). Hit Q again to exit Quick Mask mode and the gradient will now be a selection. Apply it as a mask to the shadow. As you can see the shadow now fades away from the tip of the brush (23c). The icon is finished.
No comments:
Post a Comment